开始
并且打开ProcrastinatorsRevenge.xcodeproj,编译运行,界面效果如下:
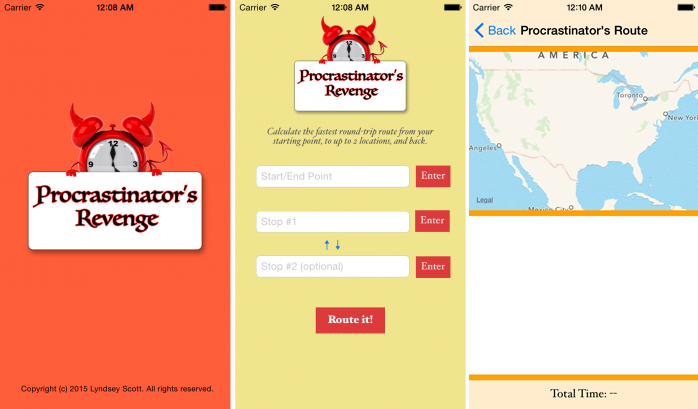
第一个屏幕是输入文本框,设置开始和终止地点,点击Route it,App将会跳转到第二个页面,开始规划路线图。
使用MapKit和Coreloaction
官方文档中对Core Loaction的描述是这样的:“Core location框架让你决定当前的坐标或者或者当前的方位通过使用设备",你将要用Core Location的特性去填充用户的开始点,Core Location能翻译坐标的经纬度为用户能够看得懂的地址信息。在MapView中,使用MapItem类的CLGeocoder类将会完成这个教程的第一部分。
在这个教程的第二部分,你将要从CLGeocoder返回的CLPlacemark中转为一个MKPlacemark,然后把MKPlacemark转换为一个MKMapItem。你将要使用MKMapItems去运行一个MKDirectionsRequest,这个最终将会返回一个MKRoute对象。
关系如下->CLGeocoder > CLPlacemark > MKPlacemark > MKMapItem > MKDirectionsRequest > MKRoute.

通过CoreLocation获取当前的坐标信息
在ViewController.swift中,添加如下代码,替换viewDidLoad已经存在的代码
1 2 3 4 5 6 7 8 9 10 11 12 13 14 15 | |
让我们说说每一步都做了什么:
- 你定义了一个全局常量
locationManager - 在
ViewDidLoad中,设置location manager的代理,当用户打开App的时候,询问用户是否允许访问用户地理位置的权限,这个弹出框第一次将会显示,当用户做出响应之后,这个框就不会再出现了。 - 一旦用户定位服务开启,设置这个
CLLocationManager’s的定位精度信息,请求当前坐标
编译运行你的程序,你是否弹出了提示框让你授权地理定位信息呢?

这是因为你还有一件事情需要完成,那就是权限问题,你需要提供原因为你的请求。
打开Supoorting Files>info.plist,按如下步骤进行设置:
- 添加
NSLocationWhenInUseUsageDescription作为Key在 Information Property List中 - 让这个
Type为String类型 - 设置这个
Value值去向用户展示,解释为什么你需要访问他们的地理信息:“请运行我们访问你的当前坐标信息,这样我们就能自动填充你的开始和结束地点了”
注意:.requestWhenInUseAuthorization() 让这个app访问当前的用户地理信息,当这个App是在使用的时候*.requestAlwaysAuthorization() * 当这个app不管是在前台还是后台的时候.这个app都能访问用户的地理信息,

编译运行你的app,这次提示框将会显示:
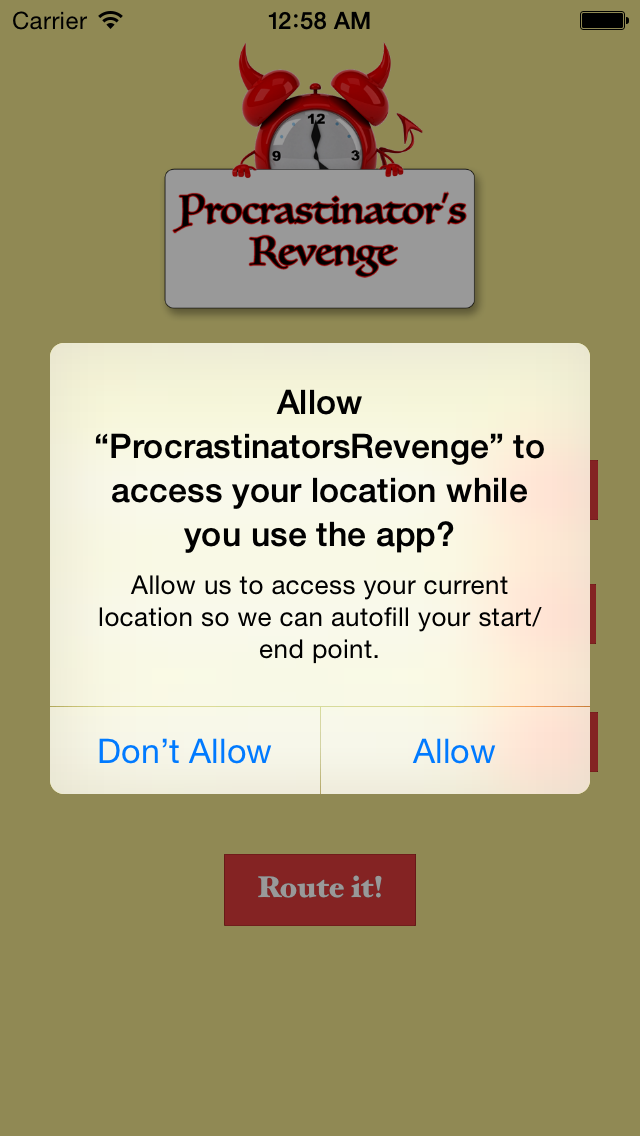
点击Allow,这个location Manager现在将会访问到你的地理坐标
下一步,你将要创建CLGeocoder去解码当前的坐标信息。解码过程就是把获取到的地理坐标,比如经纬度,转换成我们能看的懂得地理位置信息,比如长江道第三大街33号
在ViewConroller.swift的底部,添加如下代码,locationManager(_:didUpdateLocations:locations:):
1 2 3 4 5 6 | |
reverseGeocodeLocation(_:completionHandler:)将会返回一组placemarks,对于多数的geocoding结果来说,这个数组仅仅是包含一个元素;很少的情况,一个单独的地点能返回多个地理位置附近的信息。在这个例子中,我们获取第一个placemark,即:placemarks[0],将会满足需求。
你可以可以停止更新坐标信息,当你发现了一个适当的placemark的时候。
现在你通过用户的地理位置已经找到对应地理坐标的CLPlacemark,你需要去联想其它跟他相关的地理数据信息,通过用户输入的文本框中的位置。为了实现这个,当用户输入一个单独的值的时候,通过swift的元组结构值去匹配多个值。
在ViewDidLoad中,添加下面的全局变量去匹配每个UITextField响应的MKMapItem:
1
| |
对用户的坐标信息,你将要存储MKMapItems而不是CLPlacemarks,这个类型你最终将会用在初始化MKDirectionsRequest上,用来计算路径规划。
在ViewDidLoad中,添加如下:
1
| |
这里,你定义了一个数组,里面包含了元组,每个元组都包含了一个文本框和一个为空的 MKMapItem的值,这个值最终会被和文本框绑定到一起。

在locationManager(_:didUpdateLocations:location:)方法中,添加如下代码片段,在reverseGeocodeLocation(_:completionHandler:)的完成回调方法中:
1 2 3 | |
添加了一个MKMapItem代表用户当前的地理位置作为locationTuples的第一个元组对象。
下一步,在ViewController中添加下面的函数 ,去把location data中的地理信息提取出来
1 2 3 4 | |
formatAddressFromPlacemark(_:)从CLPlacemark's地址字典中通过FormattedAddressLineskey提取一组地址信息,然后每两个元素之间用逗号连接起来组成一个新的字符串。
滑动到locationManager(_:didUpdateLocations:locations:)方法,在self.locationTuples[0].mapItem初始化后添加如下代码:
1
| |
这将设置UItextField为一个新地址。
1
| |
在开始工程中,按钮的选择文本是提前设置好的,按钮的tag是按照顺序设置的,每个Enter按钮都和页面enterButtonArray建立了连接关系,上面的代码找到 tag=1的 Enter按钮,并且每个UItextField也是按照顺序设置的tag,和按钮是一一对应的。
所以按钮的状态为选中时的文本会变为✓。
编译运行你的APP,假如当前坐标是:Apple HQ,你的文本框中的文本将会是:Apple Inc., 2 Infinite Loop, Cupertino, CA 95014-2083, United States

在模拟器中,修改当前的坐标 select Debug > Location > Custom location…:

输入坐标信息:
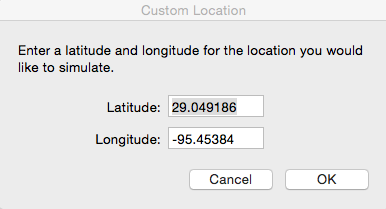
Latitude: 29.049186, Longitude: -95.45384
编译运行程序,这个文本框中将会显示:05 Any Way St, Lake Jackson, TX, 77566-4198, United States

下一步,你需要用户正确的输入地址,然后通过文本框中的值获取关联的地理位置信息,通过创建MKMapItems来获取。
用户调用CoreLoaction过程
在ViewController.swift中,更新addressEntered(_:)代码:
1 2 3 4 5 6 7 8 9 10 11 12 13 14 | |
你添加的代码做的工作如下:
- 在interface builder中,每个
Enter按钮都有一个tag,从上到下依次为1,2,3.你可以通过sender.tag来找到是那个text field.(UItextField的tag和Enter按钮的tag是一一对应的) - 通过
CLGeocoder's geocodeAddressString(_:completionHandler:).去解码地理坐标
不像reverseGeocodeLocation(_:completionHandler:), geocodeAddressString(_:completionHandler:),经常会返回多个CLPlacemark信息,在文本中输入的值经常不是仅仅匹配一个值。幸运的是,我们创建一个Tableview来显示多个数据信息,当用户选择了一项之后我们就会返回一个CLPlacemarks
看一下AddressTableView.swift.这个类,你应该很清楚tableView(_:numberOfRowsInSection:)和tableView(_:cellForRowAtIndexPath:),代理方法的作用,你将要使用在顶部定义的全局变量address数组去填充这个tableview.
在ViewController中添加如下的函数:
1 2 3 4 5 6 7 8 | |
通过方法geocodeAddressString(_:completionHandler:).返回一组CLPlacemarks数据。这里你创建一个AddressTable,并且设置了数据源addresses数组,数组中包含的元素就是CLPlacemarks
回到addressEntered(_:)方法中,在if let placemarks = placemarks回调函数geocodeAddressString(_:completionHandler:)‘s中,添加如下代码:
1 2 3 4 5 | |
你看到了属性placemarks,遍历访问并且把地址追加到Addresses数组中。最后把addresses作为参数传递给self.showAddressTable
当在第一屏幕的文本框中输入地址,并且点击Enter按钮,就会跳转到一个页面,让你选择具体是那个地址:

当你选择了其中了一个地址之后,会发生什么呢?这个table将会消失。好了,让我去实现它
当你选择另一个地址之后,你想要自动的设置选择的文本去填充第一屏幕中的文本框中的值,更新查询到的locations数组,并且设置相关的MKMapItem,并且设置Enter按钮的选中状态。
更新showAddressTable(_:)方法在ViewController.swift中:
1 2 3 4 5 6 7 8 9 10 11 12 13 | |
这里,你通过当前的文本框字段,数组placemarks,和当前的ViewController.swift的实例 创建一个AddressTableView。
在geocodeAddressString(_:completionHandler:)方法中,更新showAddressTable(_:)的参数:
1 2 | |
在查询不到地址的情况下,应该马上弹出提示框:
1 2 | |
如果geocodeAddressString(_:completionHandler:)没有返回任何placemarks,你应该显示一个error:
下一步,在表格的点击方法tableView(_:didSelectRowAtIndexPath:)中,加入代码:
1 2 3 4 5 6 7 8 9 10 11 12 13 | |
下面解释代码的意思:
- 当addresses的数量是大于当前行的索引的时候,表格的最后一行将会显示:
None of the above - 更新当前的文本框中的值为选择的地址
- 使用placemark去创建创建
MKMapItem,placemark是通过获取当前行创建的。根据当前文本框的tag获取mainViewController's locationTuples中的mapitem,并且设置它 - 设置当前
Enter为选中状态
编译运行,在Stop#1中输入地址,点击Enter,然后选择正确的地址,这个文本框中的值,地址元组(location tuple arra),还有Enter按钮将会自动更新:

Addresses updated. (Checkmarks et al.)
在ViewController.swift中你还有一部分工作需要完成。
更新代码在textField(_:shouldChangeCharactersInRange:replacementString:):
1 2 3 4 5 6 7 8 | |
当用户编辑了文本框,你将要设置MKMapItem失效,因为MKMapItem是不再需要,这样用户就可以重新选择正确的地址。
下一步,更新swapFields(_:)方法:
1 2 3 4 | |
当用户点击↑↓,你需要交换两个文本框的值,还有在数组locationTuples对应的MKMapItems
在ViewController类中,找到getDirections(_:)方法,覆盖shouldPerformSegueWithIdentifier(_:sender:):
1 2 3 4 5 6 7 8 9 | |
在ViewDidload:中对locationsArray进行设置,它是一个只读的属性,当你访问它的时候,它会从locationTuples中过滤mapItem不为nil的元素.
1 2 3 4 5 | |
filtered += [filtered.first!]拷贝元组中的第一个元素的值作为这个数组的最后一个元素。
在prepareForSegue(_:sender:):中:
1 2 3 4 | |
这个传递的参数locationsArray将会在下一个View controller中用到
现在切换到DirectionsViewController.swift,去开始路径规划吧.
在MapKit中进行路径规划
现在,你已经知道了addresses,你将要创建一个MKDirections对象,调用calculateDirectionsWithCompletionHandler(_:)设置开始坐标和结束坐标就可以开始路径规划了.
在DirectionsViewController中添加如下代码:
1 2 3 4 5 6 7 8 9 10 11 12 13 14 15 16 17 18 19 20 | |
上面的代码做的工作如下:
- 创建一个
MKDirectionsRequest,通过索引获取locationArray对应的mapItem,设置MKDirectionsRequest的开始坐标为这个mapitem,设置索引的下一个(index+1)为这个请求的目的地坐标 - 设置
requestsAlternateRoutes为true,请求从源目标到目的地所有可能的路径 - 设置交通方式为 汽车驾驶,其它几个可能的方式为:步行,所有,公交车等
- 通过
MKDirectionsRequest初始化MKDirections,然后调用calculateDirectionsWithCompletionHandler获取到一个MKDirectionsResponse,这会包含一组MKRoutes数据
如果calculateDirectionsWithCompletionHandler(_:)没有返回任何routes,而是返回一个错误,那么else if let _ = error代码将会执行,添加这个代码:
1 2 3 4 5 6 7 8 9 | |
假设MKRoutes是找到了,在第一个if let声明中calculateDirectionsWithCompletionHandler(_:)将会执行,添加如下代码:
1 2 3 4 | |
这里你按照 到达的时间 进行排序,用时最短的时间将会排在第一个,这对你的路线规划来说是有好处的。

但是,你仍然需要计算多个路径在每两个地点之间。
首先,更新calculateSegmentDirections(_:)参数:
1 2 | |
calculateSegmentDirections(_:time:routes:)现在接受一个数组和一个 NSTimeInterval 参数
1 2 3 4 5 6 7 8 9 10 11 12 13 14 | |
- 创建两个变量,一个是timeVar,一个是routeVar
- 为当前的分段路线routesVar添加最快的路径规划
- 在timeVar中添加路径规划的预计到达时间
- 当你当前的索引加上最后两个值后没有超过
location array数量值,递归调用自身方法calculateSegmentDirections(_:time:routes:),传递索引+1,当前的time和路径values.
现在回到viewDidLoad中,添加如下代码:
1 2 | |
这个代码添加一个转子activity indicator,当路径规划开始计算的时候,然后调用calculateSegmentDirections(_:time:routes:)去计算路径,从locationArray第一个索引开始,初始化时间为0,初始化一个空的路径数组
然后回到calculateDirectionsWithCompletionHandler(_:)中,在else的回调函数判断中,在if index+2 < self.locationArray.count的下面添加:
1
| |
当计算完所有的路径规划后,隐藏转子
在MKMapIVew中添加MKRoutes
为了去规划每一个MKMapView在MKMapView中,你需要在DirectionsViewController添加如下方法:
1 2 3 4 5 6 7 8 9 10 11 12 13 14 15 16 17 18 | |
plotPolyline(_:)做的工作如下:
- 添加
MKRoute到地图上,作为一个覆盖层 - 如果规划的路径仅仅是一个覆盖层,设置地图的可见区域足够大足以填充整个覆盖层,外边缘留出10个点的间距
- 如果规划的路径不是一个,设置地图的可见区域为新的和旧的的区域的联合,外边缘留出10个点的间距
下一步,更新mapView(_:rendererForOverlay:)方法
1 2 3 4 5 6 7 8 9 10 11 12 13 14 15 16 17 18 19 | |
给每一个路径路段设置不同的颜色
在calculateSegmentDirections(_:time:routes:)添加:
1 2 3 4 5 | |
这个函数循环所有的MKRoute,添加覆盖层到地图上。
在方法calculateDirectionsWithCompletionHandler(_:)中,调用showRoute(_:)方法。在elseblock中你调用的self.hideActivityIndicator():的代码上面调用
1
| |
编译运行,输入地址然后点击Route it,路线规划将要出现在地图上:

下一步,你要打印路线的每一步路径信息到DirectionsTable上
打印MKRoute的路径信息
DirectionsTable.swift包含一个全局的数组directionsArray,是一个包含元组的数组(string,string,MKRoute).这两个字符串是开始地址和结束地址,最后一个MKRoute,是路径的信息。
滑动页面到UITableViewDataSource的扩展方法中,在代理方法numberOfSectionsInTableView(_:)设置返回的数量,这个表格将要包含一个section为存储在directionsArray中每一个route。
这样你的DirectionsTable的每一个section就会为route呈现一个不同的分段.
代理方法tableView(_:numberOfRowsInSection:)将会返回MKRouteSteps的数量,比如:directionsArray[section].route.
从开始地点到目的地一共有多少步.
在tableView(_:cellForRowAtIndexPath:)中,添加如下代码:
1 2 3 4 5 6 7 8 9 10 | |
在每一行中,你打印MKRouteStep的说明信息和距离等:
- 通过当前的section的值,得到
MKRoute,然后通过MKRoute获取MKRouteSteps的数组 - 从steps的数组中,访问
MKRouteStep的对象通过当前行。 - 获取step的说明信息
- 获取step的距离信息,在
CLLocationDistance的扩展方法中,定义了一个miles()方法,通过这个方法把距离转为 米 单位 。 - 设置label显示出每一步的说明信息和距离
现在,你可以使用UITableViewDelegate的扩展方法去显示开始地点和结束地点的信息。可以在每一个section中的header中显示开始地址,在footer中显示结束地点。
在tableView(_:viewForHeaderInSection:)添加如下代码:
1
| |
这个头部view包含了开始地址:
在tableView(_:viewForFooterInSection:)中添加如下代码:
1 2 3 4 5 6 7 8 | |
- 得到当前的section route
- 从NSTimeInterval的扩展中,通过
formatted()格式化expectedTravelTime,formatted()方法通过NSDateComponentsFormatter吧NSTimeInterval转为时分秒的格式 - 通过
CLLocationDistance格式化距离 - 让表格的label显示结束地址,距离和期望到达时间信息
现在回到DirectionsViewController中,添加如下方法:
1 2 3 4 5 6 7 | |
更新showRoute(_:):方法:
1 2 3 4 5 6 7 8 9 10 11 | |
对于每一个路径规划,你都添加了开始地址和结束地址,然后添加MKRoute到directionsArray数组中
下一步,你需要更新totalTimeLabel去显示总的期望达到时间。总的时间需要通过可变参数在calculateSegmentDirections(_:time:routes:).方法中计算出来。
所以更新showRoute(_:)方法,添加一个NSTimeInterval参数
1
| |
在DirectionsViewController类中添加如下方法
1 2 3 4 | |
该方法在totalTimeLabel中显示出来总共时间
最后在函数的末尾,调用printTimeToLabel(_:)
1
| |
编译运行:
